Using Your Profile
Learn how the Profile area gives each user control over their own view, preferences, and personal setup while still fitting within the wider structure of the company CRM.
Thought Process
Creating a Profile section became important once it was clear that not all users want the same dashboard, layout, or viewing preferences. Some staff prefer a simpler screen, while others want more detail available immediately.
The Profile area has therefore been designed to give the individual user more control over how they work inside the CRM. While company-wide settings may still shape some parts of the system, the personal profile allows users to adapt their own space and then change it again later if their preferences or role changes.
Personal control
The aim is to let each user shape parts of their own experience without needing every small change to be handled centrally.
Easy to change later
Preferences can be altered again in the future, so the screen setup does not need to stay fixed if the user’s working style changes.
What the Profile Area Covers
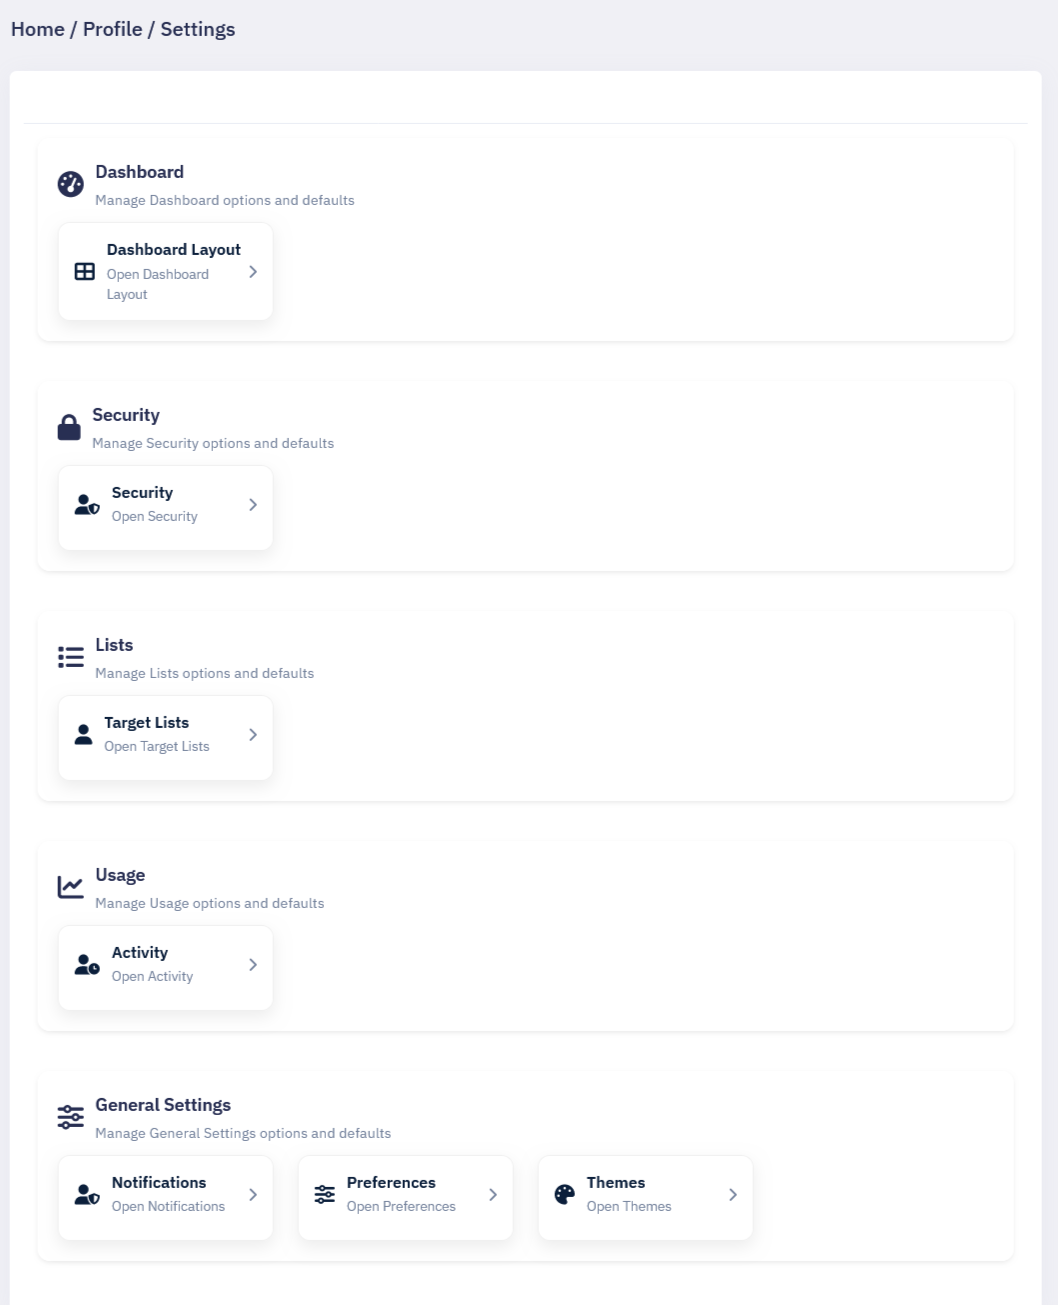
Dashboard
Go to the Profile icon, expand the available options, and choose the preferences that best suit the way you want to view and use your CRM.
Security
Security settings can be aligned to how your organisation wants to work, including IP lockdown, passwords, and two-factor authentication.
Log in time restrictions
These can also be part of the wider security setup, even if they are not always shown clearly within the main body of the page.
Target Lists
This area is intended to let users create their own target lists from within the Profile section, although this part may not yet be fully working.
Activity
Activity-related profile options can help shape how information is shown back to the user, depending on how the page has been configured.
General Settings
General preferences provide a place for broader personal choices that affect how the user experiences the CRM day to day.
Simple Walkthrough
- Open the Profile icon in the system.
- Expand the list of available profile sections.
- Choose the area you want to change, such as dashboard or security.
- Adjust the options which are available to you.
- Save the changes so your profile reflects your preferred setup.
- Return at any time if you want to alter the layout or preferences again.
Getting the Most From Your Profile
Shape the screen around your workflow
Give users control over how they view their own pages so they can find the best way to work and see exactly what matters most to them.
Review settings from time to time
A setup that works well today may need adjusting later, especially if a role changes or a user begins using different parts of the CRM.
Target lists can be created elsewhere too
Target lists may be created here or directly from an account page. When created from an account page, they become available across the wider system rather than just as a personal list.
Match personal use with company rules
Even where users have flexibility, keep in mind that company-level security settings may still affect what can and cannot be changed.
Profile Screen Example